Safely Shipping Cookies,
Dog Biscuits, & Treats
Shipping cookies, whether they are for your four-legged or two-legged friends and family, is quite similar. By following these simple how-to steps, you're sure to give a homemade gift that they will remember long past the time when the last dog cookie is eaten.
Homemade gifts are more than the sum of their parts. A homemade gift, including homemade dog treats, contain within them time, effort, and love. They make a great gift any time of year.
By shipping cookies or dog biscuits to your family and friends, you can help dogs everywhere learn to love the mailman again! By following these simple how to tips, you'll ensure your homemade dog cookies won't end up in crumbs.
Steps to Shipping Cookies
& Homemade Dog Treats
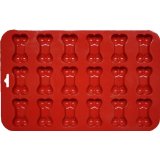
- Choose a Recipe - The dog treats you choose to make and ship is the first decision, and a very important one. You may expect that shipping cookies that are dry and hard are the only dog cookies that can be safely shipped. Well, that's just not the case. Homemade dog treats that are baked crunchy are definitely the easiest to mail, but you aren't limited to these. If you choose a softer dog treat you'll need to take extra precautions as you go through these steps. If you choose to use cookie cutters, chose a smaller shape with little or no fragile pieces. For example a 1 inch dog bone cookie cutter would be an excellent choice. Whereas a dog shaped cookie cutter with fragile legs will need to be very carefully wrapped (see the tips below) to make it to it's destination in one piece.
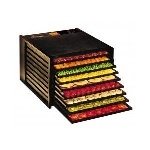
- When to Bake - For the freshest homemade dog gifts, you'll want to bake and ship the dog treats the same day, or within 24 hours. You can also bake and freeze the dog treats for later gift giving. Thaw the biscuits in the refrigerator and then let them come to room temperature, making sure there is no excess moisture, before proceeding with the following steps.
- Cooling I can't over emphasis the importance of letting your homemade dog treats cool completely. This may take several hours. So, use the time to complete some of the following steps, or take your dog for a long walk or hike.
- Wrap the Dog Cookies If the dog treats you bake are large (approx. 3 inches or larger), you will want to wrap them individually for added protection. If they are smaller, wrap two, but no more than three together in plastic wrap. Place the cookies back to back when wrapping them together. Although this step may seem to be time consuming, remember that shipping cookies and other delicate food items, have to go through a rough process. Wrapping them helps keep them in one piece during this process.
- Choose an Inner Container - Once you have the dog treats wrapped, you can properly choose the size of box, cookie tin, or other small container you'll be using. If you use a box, make the box special by using a printed gift box or once the box is sealed, wrap it with wrapping paper and ribbon. A cookie tin is also a wonderful way to give homemade dog treats because the human recipient can reuse the tin for other homemade gifts or decoration once the treats are gone. An airtight plastic container, such as Tupperware, is a practical container since it helps keep the cookies fresh during mailing, and it can be used once the dog biscuits are eaten. You can even use an empty coffee can or an empty Pringle's container to pack your homemade dog gifts into. Each of these can be decorated with wrapping paper and ribbon to disguise what they once were.
- Pack your Inner Container Next, pack your wrapped dog biscuits into the box or tin securely. When you're mailing or shipping cookies, you want to make sure they are nice and snug. Start with a crumpled piece of wax paper at the bottom. Then a layer of wrapped dog biscuits. You may be able to skip this next step if you have wrapped each cookie, but as an added step of protection, you can layer a sheet of parchment or wax paper in between each layer of dog cookies. If there are any air pockets, use one of the packing materials listed below to fill in the gaps. Lastly, finish with another crumpled piece of wax paper at the top. Once you feel the tin is packed well, close the lid and shake gently. This will allow the contents to settle and you can reopen the container and fill in any air pockets.
- Choosing & Packing the Outer Shipping Box The box you choose needs to be heavy-duty. Shipping your gift parcel post can take 2 to 3 weeks for delivery, so you may want to consider shipping your treats by US priority mail. You can use the post office's free priority mail shipping boxes if you chose this method. It's best to allow 2 to 3 inches of cushion between the inner box or tin and the outer box. Choose one or more of the packing materials listed below.
- Packing Material Choosing a packing material for shipping cookies will depend on what you have on hand. You can choose one or more of these types of material as the buffer between your inner dog cookie container and the outer shipping box:
- shipping peanuts
- air-popped popcorn (no butter or flavorings)
- crumbled paper
- shredded paper
- newspaper
- tissue paper
- wax paper
- bubble wrap
- clean plastic bags
- biodegradable shipping peanuts made from cornstarch.
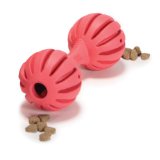
My all time favorite packing material for shipping cookies is a soft dog toy. Use a couple plush dog toys to work as padding just like the other traditional materials.
- Signed, Sealed & Delivered You have gone to such lengths to make your homemade dog gift safe for mailing, let's not drop the dog ball now! :) Before sealing the box, it's nice to include the dog treat recipe for the dog biscuits. You can also add a personal greeting card, (save a stamp, include the card now) with the cookies. Use heavy-duty shipping tape to seal your box on the top and bottom. Next print out Fragile and/or Perishable in several places on the outer box. Or, leave this step to the end when you are at the post office and ask the clerk to use their stamp that says fragile. Clearly write or better yet, print out the recipient's name and address. A fun way to label your gift is with the dog's name and the human parent's last name and then a the symbol for care of with the humans full name and address, for example:
Spot Smith
c/o Ann Smith
123 Main Street
City, State Zip Code
Everyone loves to receive packages in the mail. That's why shipping cookies, especially homemade dog cookies, is sure to make the list of favorite dog gifts. All dogs deserve homemade dog treats, so we hope you consider mailing dog treats to your friends and family any time the gift giving spirit strikes you.


Featured
Dog Treat Recipe
Frozen Yogurt &
Tuna Pops
|
FREE Dog Treat Recipe eBook. Subscribe to |
Recommended Products